Cart
0





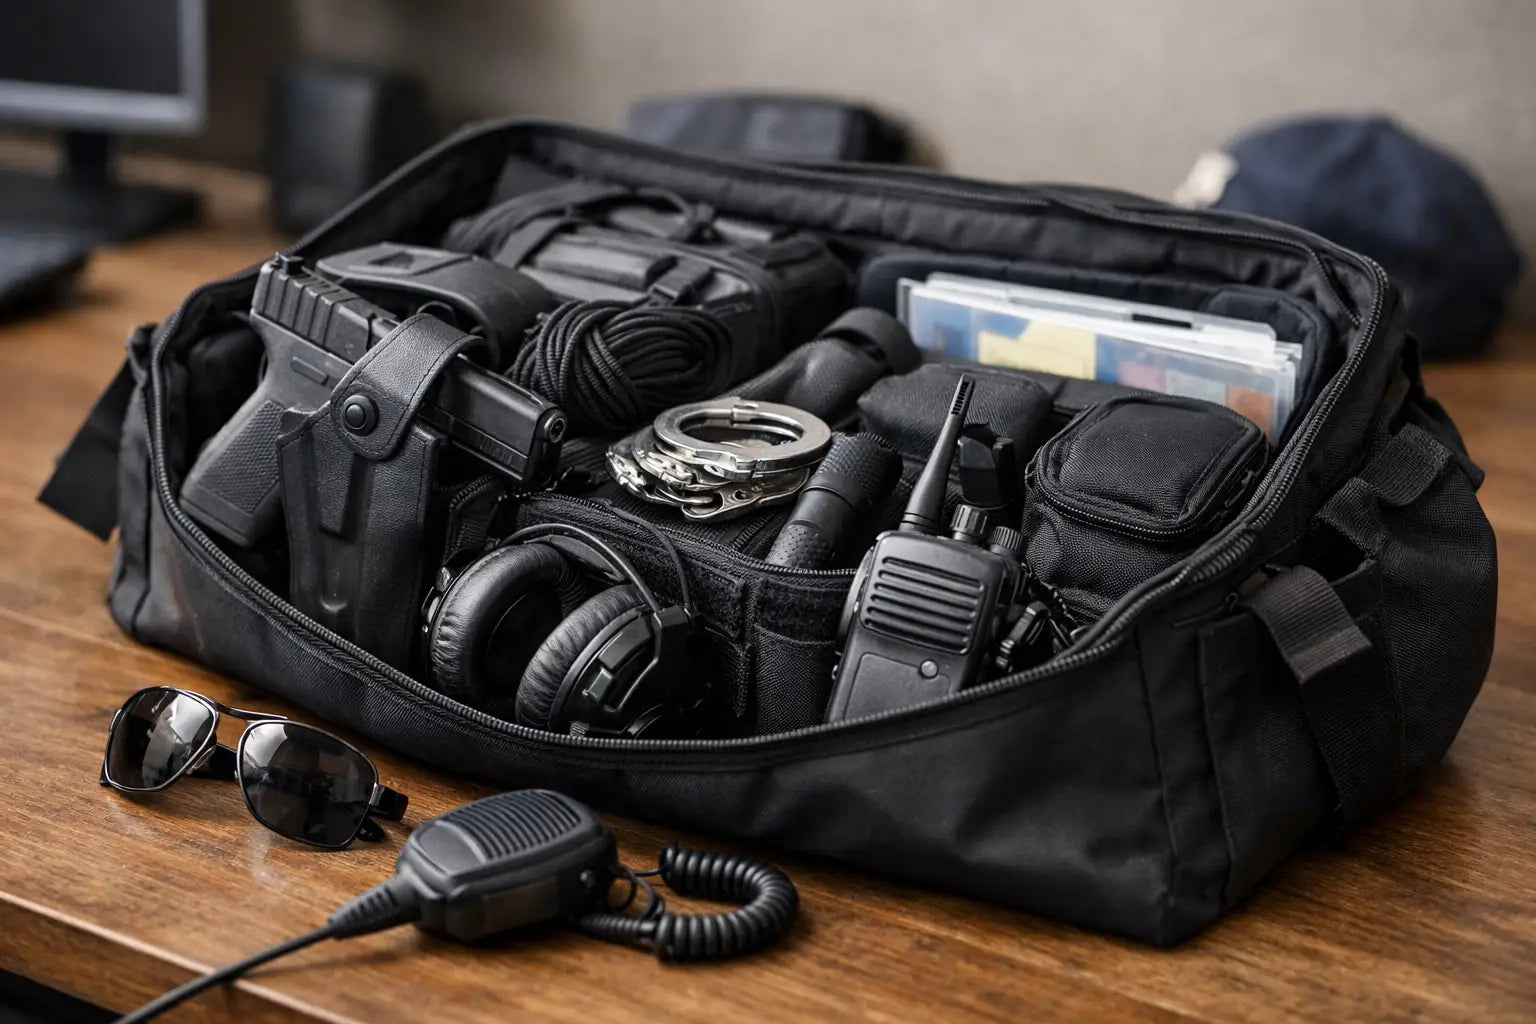
A duty bag usually gets judged at the worst possible moment - in the dark, under stress, when you need one item right now and your hand lands on everything except it. That is why knowing how to pack a duty bag matters. A well-packed bag saves time, protects critical gear, and cuts down on the small mistakes that turn into bigger problems during a shift.
There is no single layout that works for every officer, security professional, corrections team member, or EMS provider. Your assignment, agency policy, vehicle setup, climate, and shift length all change what belongs in the bag and where it should ride. The goal is not to carry everything you own. The goal is to carry what supports your job, in a layout you can access without thinking.
How to pack a duty bag starts with your role
Before you touch a zipper, define what the bag is supposed to do. For some users, it is a patrol support bag that stays in the passenger seat or trunk. For others, it is a grab-and-go loadout for security details, courthouse work, transport assignments, or range days. EMS personnel may need a different balance between medical access, spare clothing, and scene support items.
That first decision changes everything. A patrol bag may need fast access to gloves, a flashlight, notebook, batteries, and traffic gear. A corrections bag may prioritize admin items, personal protective equipment, hydration, and spare uniform components. If you mix every possible use into one bag, you usually end up with more weight, more clutter, and slower access.
Start by separating your gear into three categories: must-have every shift, assignment-specific gear, and nice-to-have extras. Most overpacked duty bags are full of that third category.
Pack by speed, not by category alone
A lot of people organize a bag the way a store shelf looks - lights with lights, medical with medical, tools with tools. That makes sense until you need several items in sequence during one call. Good packing is based on access speed and use pattern.
The items you touch most should live in the easiest-to-reach compartments. That usually means the top pocket, front admin section, or an exterior compartment with a clear opening. Gloves, pens, notepad, spare flashlight, hand sanitizer, eye protection, and phone charging accessories often belong there.
Items you need less often but still want quickly available should sit in the main compartment near the top or in clearly marked pouches. Think spare magazines if policy allows off-body storage, report materials, evidence packaging supplies, small medical items, rain gear, or traffic gloves. Bulky backup items can ride deeper in the bag.
This is where many users get tripped up. They pack by item type instead of by response sequence. If you routinely reach for gloves, flashlight, and note-taking gear in the first minute of a stop or call, those items should not be buried under spare socks and charger cables.
Build your duty bag in layers
The cleanest way to pack a duty bag is to think in layers. The outer layer is immediate access. The middle layer is operational support. The bottom layer is contingency gear.
Immediate access is what you can grab while standing at the vehicle or opening the bag with one hand. These are high-frequency items and should be consistent every shift. If they move around, your bag stops being reliable.
Operational support includes the tools that keep you effective through the shift but are not needed every hour. This could include extra batteries, weapon cleaning wipes, flex cuffs, spare medical gloves, energy snacks, forms, or a backup light. These should still be organized, but they do not need premium pocket space.
Contingency gear is for bad weather, extended scenes, contamination, or long shifts. Spare base layers, extra socks, a compact towel, overgloves, poncho, or cold-weather accessories belong here. Keep them compressed and out of the way. They matter, but they should not interfere with your primary workflow.
Use pouches, but do not overcomplicate it
Small organizers and pouches can make a duty bag far more usable. They can also turn it into a puzzle if you go too far. The right approach is simple: one pouch for admin, one for medical or PPE, one for electronics or batteries, and maybe one for personal items.
Labeling helps, especially if you work nights, rotate assignments, or share vehicle space. Color coding helps even more if your bag allows it. A red medical pouch or a bright admin insert is easier to find under stress than a pile of matching black zip bags.
The trade-off is bulk. Every pouch takes up space and adds another zipper. If your bag is medium-sized and your loadout is modest, too many organizers can waste capacity. Use them where they speed up access, not just because they look organized.
Protect what cannot fail
Not all gear belongs loose in a bag. Optics, eyewear, electronics, and certain medical items need protection from impact, moisture, and heat. If your bag rides in a patrol vehicle in South Florida or any hot climate, temperature matters. Battery life, adhesive-backed items, and some medical supplies do not love a hot car.
Use padded sleeves or hard-sided inserts where needed. Keep batteries in a dedicated case. Store charging cables so they do not tangle around critical tools. If you carry backup eyewear or a compact optic-related tool kit, protect it from getting crushed under heavier gear.
The same goes for paperwork and credentials. A wet notebook, bent citation book, or damaged agency document holder is not just annoying. It can slow down the whole shift.
Keep clean gear separate from dirty gear
This is one of the biggest packing mistakes in public safety. Used gloves, wet gear, sweat-soaked undershirts, and contaminated items should never mix with clean replacement gear, snacks, or daily-use equipment.
Dedicate one section of the bag, or one disposable liner bag inside it, for dirty or potentially contaminated items. If your assignment regularly exposes you to bodily fluids, rain, mud, or evidence-related contaminants, this separation is not optional. It keeps the rest of your loadout usable and helps with hygiene at the end of shift.
If your bag does not have a waterproof compartment, add a simple sealed pouch or tough utility bag. It is a small fix that solves a very real field problem.
Balance weight and carry comfort
A duty bag that is packed well but weighs too much is still packed poorly. If you carry it from the lot to briefing, from vehicle to post, or from station to range, bad weight distribution gets old fast.
Heavier items should sit low and close to the center of the bag. Avoid loading one side with metal gear while the other side carries only paperwork or clothing. That uneven carry is hard on handles, shoulder straps, and your back.
It is also worth checking whether your bag is doing a job that should really belong to your vest, duty belt, vehicle organizer, or locker. Some gear needs to stay on your person. Some belongs staged in the car. A duty bag should support your work, not replace every other part of your setup.
What should always be checked before shift
The best-packed bag in the world still fails if it is not maintained. A quick pre-shift check catches most problems before they cost you time.
Make sure batteries are charged, consumables are replaced, paperwork is current, and weather-specific items match the day. If you used your last pair of nitrile gloves on the previous shift, restock them now. If your flashlight was borrowed for a vehicle search and dropped back into the wrong pocket, reset it now.
This is also the time to remove dead weight. Expired snacks, dried-out markers, empty battery sleeves, and old paperwork build up fast. A duty bag gets better when it is edited regularly.
How to pack a duty bag for real-world use
Field conditions are never as neat as your living room floor. You may be packing and repacking in a parking lot, at the end of a long shift, or between assignments. That is why your layout has to be repeatable.
If you cannot repack the bag correctly in under a few minutes, the system is too complicated. If you have to open every compartment to find one item, the layout needs work. If your most-used gear migrates every week, you need fixed locations and a better reset routine.
For most professionals, the best setup is not the most tactical-looking one. It is the one that gives you fast access, protects critical gear, carries cleanly, and stays consistent through real use. That is where quality bag design matters, and it is why public safety professionals tend to stick with dependable gear once they find it.
A duty bag should make your shift easier, not louder, heavier, or more frustrating. Pack it with intent, keep it current, and let every pocket earn its space. When the call comes and you reach in without thinking, that is when you know the setup is working.